Throughout the article you will find hyperlinks to Microsoft msdn articles on the related subject.
Lets take a brief look at the steps we are taking to configure single sign-on.
- Set up the domain
- Add your company domain and verify using TXT or MX DNS records
- Set up AD User Principal Names
- Configuring additional UPN if you not using an external resolvable FQDN domain for your UPNs
- Configure AD sync to Azure AD
- How to enable directory synchronization
- ADFS Federate the domain with Azure AD
- Federate the domain you added on step 1 with Azure AD using Powershell
- Testing/Troubleshooting
- Testing and troubleshooting the configuration using Microsoft online tool
- Logging on with Multi Factor Authentication
- Authentication with Single sign-on plus Multi Factor Authentication
- Azure portal and Office 365 portal
- Overview of both portals and how to configure the same steps in office 365 portal
The installation of the ADFS server or the installation of the Windows Azure Active Directory Synchronization tool is not covered on this article, if you need help with ADFS or the Directory Synch Tool or if you have any questions regarding the set up of single sign-on please don't hesitate to contact me on nuno.m.costa@gmail.com
1. Set up the Domain
The first step is to add your company domain to Azure and verify it by adding a custom TXT record to your domain DNS zone.
 To do this Navigate to Active Directory and choose Default Directory navigate to the Domains tab and on the bottom of the page click Add Domain. Type the domain and select "I plan to configure this domain for single sign-on"
On the domains tab you now see the newly added domain and says unverified

Click Verify at the bottom of the page and you should get details of the TXT record to add to your DNS zone. Later on step 7 I show you how office 365 portal makes things slightly easier when adding a custom domain.
In your DNS server you should add a TXT record as follows:

2. Set up AD User Principal Names
For Single sign on to work users UPN need to be resolved externally this means your users UPN logon name must be resolved externally. If you are using .local internal domains you can add extra UPN's to your internal Active directory and instruct users to start logging on with the new UPN.
http://msdn.microsoft.com/en-us/library/azure/jj151786.aspx
To set up additional UPN suffixes open Active Directory Domains and Trusts right click the root and properties, add the domain you just verified on step 1


3. Configure AD synchronization to Azure
To configure your local Active directory to sync user accounts and groups to Azure AD you will need to install and configure the Windows Azure Active Directory Sync Tool.
 Before you can go ahead and synchronize your local AD environment to Azure you need to make sure you Activate Azure for Directory Synchronization. Navigate to Active Directory click Default Active Directory and click the tab Directory Integration:
The installation and configuration of the tool is out of scope of this article, you can find loads of information online about how to install and configure the Windows Azure Active Directory Sync Tool.
When the synchronization is complete check Azure if your user and group accounts are now visible on your AD instance in Azure.

Note: After you synchronize users to Azure/Office 365 they need to be activated and licenses assigned. By default users are deactivated when synchronized to the cloud.
4. ADFS - Federate the domain with Azure AD
This is the step where you connect your ADFS server to Azure and federate your company domain for single sign-on. This process will automatically add to your ADFS server a relying party trust with office 365.
First you need to install Azure Active Directory Power Shell Tools so you can connect to your Azure Active Directory instance and run a few commands to federated domain with Azure:
$cred=Get-Credential
Connect-MsolService –Credential $cred
Set-MsolAdfscontext -Computer MyADFSserver
Convert-MsolDomainToFederated –DomainName myDomain.com
The first step is to add your company domain to Azure and verify it by adding a custom TXT record to your domain DNS zone.
On the domains tab you now see the newly added domain and says unverified

Click Verify at the bottom of the page and you should get details of the TXT record to add to your DNS zone. Later on step 7 I show you how office 365 portal makes things slightly easier when adding a custom domain.
In your DNS server you should add a TXT record as follows:
2. Set up AD User Principal Names
For Single sign on to work users UPN need to be resolved externally this means your users UPN logon name must be resolved externally. If you are using .local internal domains you can add extra UPN's to your internal Active directory and instruct users to start logging on with the new UPN.
http://msdn.microsoft.com/en-us/library/azure/jj151786.aspx
To set up additional UPN suffixes open Active Directory Domains and Trusts right click the root and properties, add the domain you just verified on step 1
Open Active Directory users and computers right click on a test account and click properties on the account tab you will see that from the drop down box after user logon name you have an additional UPN available.
To configure your local Active directory to sync user accounts and groups to Azure AD you will need to install and configure the Windows Azure Active Directory Sync Tool.
The installation and configuration of the tool is out of scope of this article, you can find loads of information online about how to install and configure the Windows Azure Active Directory Sync Tool.
When the synchronization is complete check Azure if your user and group accounts are now visible on your AD instance in Azure.
Note: After you synchronize users to Azure/Office 365 they need to be activated and licenses assigned. By default users are deactivated when synchronized to the cloud.
4. ADFS - Federate the domain with Azure AD
This is the step where you connect your ADFS server to Azure and federate your company domain for single sign-on. This process will automatically add to your ADFS server a relying party trust with office 365.
First you need to install Azure Active Directory Power Shell Tools so you can connect to your Azure Active Directory instance and run a few commands to federated domain with Azure:
$cred=Get-Credential
Connect-MsolService –Credential $cred
Set-MsolAdfscontext -Computer MyADFSserver
Convert-MsolDomainToFederated –DomainName myDomain.com
Download windows power-shell:
Set up a trust between ADFS and Azure AD:
When completed you should see the following Relaying party trust in your ADFS server:

5. Testing/Troubleshooting
Microsoft provides the Remote Connectivity Analyzer tool to test and troubleshooting the multiple layers of a single sign-on implementation and provides detailed information if anything goes wrong.
You can access the tool here:
https://testconnectivity.microsoft.com/?testid=SingleSignOn


6. logging on
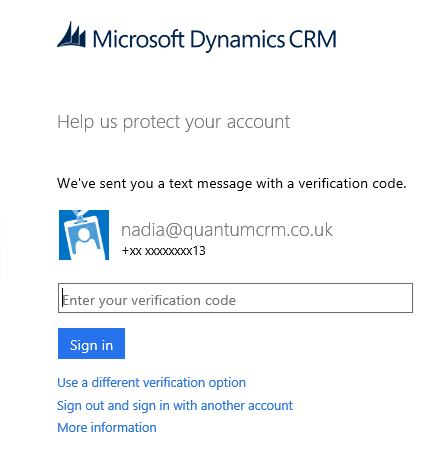
If all goes well when you access your online CRM instance you should see Microsoft redirecting you to your company ADFS server for authentication and the ADFS server will issue a token saying that your credentials have been verified. However in my scenario, I've configured my test account nadia@quantumcrm.co.uk with Multi Factor Authentication. When I attempt to logon it stops me and sends me a text message with a code for me to check my identify, screenshots below:
Note that for global administrators Multi Factor Authentication is free, so you can test this in your test environment.
A code was sent to my phone in a couple of seconds and I just had to insert that code for CRM to load. Although the user didn't have to insert her password because it's configured for single sign-on she was configured for multi factor authentication which forced an extra level of security.
You also have the Microsoft Phone App which can be used for Multi factor Authentication instead of text messages.
After inserting the code and clicking sign in I land on my CRM online instance.

7. Azure and Office 365 portals
Azure and Office 365 portals are very similar with regards to providing menus to set up domains and single-sign on configuration. If you have access to the Azure instance associated to your office 365 account you will notice that everything that you configure in Azure will automatically surface in Office 365 and the same way if you do any configuration in Office 365 will also surface in Azure both portals connect to the same "collection" of services e.g your active directory instance in the cloud.
Below a few screenshots of office 365 portal showing you where to find and configure the same features we have just done in Azure.


When you click Add domain, you will be taken to a 3 step process to create, confirm and verify the domain you just added.
When selecting general instructions the below page comes up with all the information you need to create the required TXT or MX record on your DNS zone to verify the domain.

Users and Single Sign-On configuration.
Clicking on the Users & Groups and Active users you can manage all user accounts including passwords and licenses. Notice that from this configuration panel you can also manage:
- Single-sign on
- Enable Directory synchronization
- Change password policy
- Configure multi-factor authentication.

clicking Manage Single sign-on provides you with a 10 step process on how to implement Single sign-on with your company AD and the office 365 platform. This is exactly the same as in the Azure - Directory Integration steps, which have been simplified into 4 main topics with child steps below as you can see on the below screenshots
Azure Portal

Office 365

Conclusion
I hope the article was useful please leave your feedback. I have not covered some features in great detail like how to install and configure ADFS or the windows Azure Synchronization tool this would make the all article very long and remove the focus from single sign-on.